How to Create MIDI Files: A Beginner’s Guide
Introduction to MIDI Files
MIDI, which stands for Musical Instrument Digital Interface, is a protocol developed in the 1980s which allows electronic instruments and other digital musical tools to communicate with each other. MIDI itself does not make sound, it is just a series of messages like ‘note on’, ‘note off’, ‘note/pitch’, ‘pitchbend’, and many more. These messages are interpreted by a MIDI instrument to produce sound.
Why Use MIDI Files?
MIDI files are incredibly versatile, being able to communicate a wide range of musical information. They can tell your synthesizer to change sounds, your drum machine to alter patterns, and much more. The possibilities are virtually endless. This makes MIDI files an essential tool for any electronic musician.
Creating MIDI Files: A Step-by-Step Guide
Creating MIDI files may seem daunting at first, but once you understand the basics, it becomes much easier. Here are the basic steps:
Step 1: Choose Your MIDI Software
There are many different types of software that can be used to create MIDI files, ranging from simple programs that let you input notes on a piano roll, to complex DAWs (Digital Audio Workstations) that allow you to compose entire songs with multiple instruments. Some popular choices include GarageBand, Logic Pro X, and Ableton Live.
Step 2: Create a New Project
Once you’ve chosen your software, the next step is to create a new project. This will usually involve opening the software and selecting ‘New Project’ or ‘Create New’ from the file menu.
Step 3: Input Notes
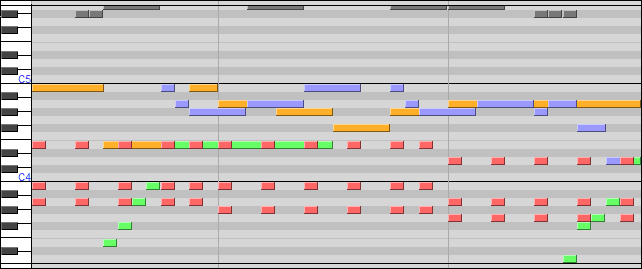
Next, you’ll need to input some notes. This can be done in a variety of ways, depending on the software you’re using. Some programs will allow you to input notes using a virtual keyboard, while others will require you to draw them in with your mouse.
Step 4: Edit Your MIDI Data
After you’ve input some notes, you can start to edit them. This could involve changing their pitch, duration, velocity (how hard the note is hit), or other parameters. This is where you can really start to shape the sound of your music.
Step 5: Export Your MIDI File
Once you’re happy with your composition, you can export it as a MIDI file. This will usually involve selecting ‘Export’ or ‘Save As’ from the file menu and then choosing ‘MIDI’ as the file type.
Advanced Techniques for Creating MIDI Files
Once you’ve mastered the basics of creating MIDI files, there are a number of advanced techniques you can use to create more complex compositions. These include:
Using Controllers
Most MIDI software will allow you to use MIDI controllers. These are devices that you can connect to your computer and use to input MIDI data. They can be anything from a simple keyboard to a complex drum machine.
Using Sequencers
Sequencers are a type of software that allow you to arrange your MIDI data in a specific order. This can be particularly useful if you’re creating a song with multiple parts.
Using MIDI Effects
MIDI effects are a type of software that can alter the sound of your MIDI data. They can be used to add reverb, delay, distortion, and other effects to your music.
Conclusion
Creating MIDI files can seem complex at first, but with a bit of practice, anyone can start making their own music. Whether you’re a professional musician looking to expand your toolkit, or a hobbyist looking to experiment with electronic music, understanding how to create MIDI files is an essential skill.

